razor e100 electric scooter manual
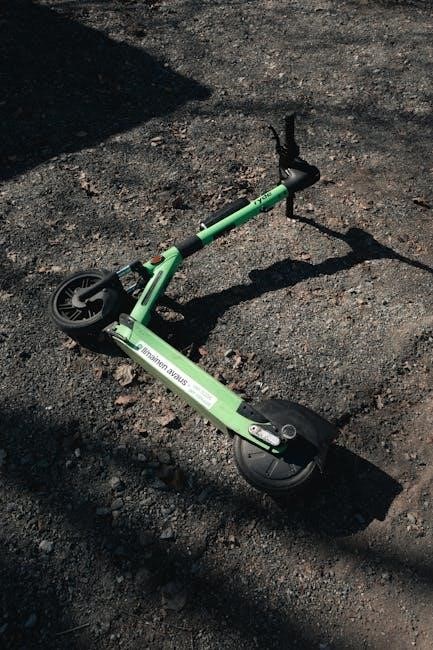
The Razor E100 is a lightweight, durable electric scooter, ideal for riders eight years and up. It boasts a 10 mph top speed and a 10-mile range.
Overview of the E100 Model
The Razor E100 represents a popular entry point into the world of electric scooters, specifically designed for younger riders. This model features a chain-driven rear-wheel motor, delivering reliable performance for recreational use. It’s built with a steel frame, ensuring durability and capable of supporting riders up to 120 lbs.
The E100’s design prioritizes simplicity and ease of use, making it an excellent choice for beginners. It’s powered by a 24V sealed lead-acid battery system, providing a range of up to 10 miles on a single charge. The scooter’s speed is electronically limited to 10 mph, enhancing safety for less experienced riders. The manual emphasizes responsible operation and adherence to safety guidelines.
Target Rider Age and Weight Limit
The Razor E100 is specifically engineered for riders aged 8 and up, ensuring a safe and enjoyable experience. This age recommendation is crucial, as it considers the developmental stage and coordination skills necessary to operate the scooter responsibly. However, age isn’t the sole determining factor; rider maturity and understanding of safety precautions are equally important.
Crucially, the E100 has a maximum rider weight limit of 120 pounds (54 kg). Exceeding this weight limit can compromise the scooter’s performance, stability, and braking effectiveness, potentially leading to accidents. The owner’s manual strongly advises against operation by individuals exceeding the specified weight, prioritizing rider safety and scooter longevity.
Key Features and Specifications
The Razor E100 boasts a powerful, yet quiet, chain-driven motor that engages when the scooter reaches a speed of 3 mph (5 km/h). It achieves a top speed of 10 mph, providing an exhilarating ride for young riders. The scooter’s range is approximately 10 miles on a single full charge, ideal for neighborhood cruising or short commutes.
Key specifications include a 24V battery system, a steel frame construction for durability, and pneumatic tires for a smoother ride. The E100 features a rear fender brake for reliable stopping power. Its lightweight design enhances portability, while the adjustable handlebar height accommodates growing riders. The scooter is designed for simplicity and ease of use.
Safety First: Important Precautions
Review the manual thoroughly before operation, ensuring all riders understand warnings and instructions for safe, responsible use of the Razor E100 scooter.
Mandatory Safety Gear (Helmet, Pads)
Always prioritize safety when operating the Razor E100. A properly fitted helmet is non-negotiable and must be worn at all times during riding. Beyond a helmet, knee and elbow pads are strongly recommended to minimize injury from potential falls. Wrist guards are also a valuable addition to your safety ensemble.
Ensure all safety gear fits securely and comfortably, allowing for a full range of motion. Regularly inspect your helmet for any signs of damage or wear, and replace it if necessary. Remember, protective gear significantly reduces the risk of serious injuries, allowing you to enjoy the Razor E100 responsibly and with peace of mind. Safety isn’t optional; it’s essential!

Pre-Ride Inspection Checklist
Before each ride, a thorough inspection is crucial for safe operation. First, check the tire pressure – properly inflated tires enhance stability and range. Next, examine the brakes, ensuring they engage firmly and effectively. Inspect the handlebars and stem, verifying they are securely tightened and locked in place.
Also, visually inspect the battery for any damage and confirm it’s fully charged. Check all cables and wires for fraying or loose connections. Finally, ensure all safety features, like reflectors, are present and functioning. A quick, consistent pre-ride check can prevent accidents and extend the life of your Razor E100. Don’t skip this vital step!
Safe Riding Environment Guidelines
Prioritize safety by selecting appropriate riding locations. Always ride in well-lit, smooth, and dry areas, free from obstacles like gravel, sand, or water. Avoid busy streets, heavy traffic, and steep hills, especially when starting. Never ride on public roads or sidewalks unless permitted by local laws.
Be mindful of pedestrians and other riders, maintaining a safe distance. Ensure ample space for braking and maneuvering. Avoid riding at night or in low-visibility conditions without proper lighting. Regularly scan your surroundings for potential hazards. A controlled environment significantly reduces the risk of accidents and ensures an enjoyable riding experience with your Razor E100.

Assembly and Initial Setup
Begin with unboxing and identifying all components. Then, install the handlebar and stem securely, followed by proper battery installation and a full initial charge.
Unboxing and Component Identification
Carefully unpack the Razor E100 scooter and verify all components are present. You should find the scooter frame, handlebars, stem, battery, battery charger, and the owner’s manual. Inspect each part for any shipping damage before proceeding. The motor is integrated into the rear wheel hub. Note that manual illustrations are for demonstration and may differ slightly from your actual product. Familiarize yourself with the brake lever, throttle, and power switch locations. Ensure the included tools are available for assembly. Retain the packaging for potential future transport or warranty claims. Confirm all stickers and safety labels are intact and legible. Proper identification of each component is crucial for a successful assembly process.
Handlebar and Stem Installation
Begin by loosening the stem clamp on the scooter’s fork. Carefully insert the handlebars into the stem, ensuring they are centered. Tighten the stem clamp securely, but avoid over-tightening, which could damage the stem or fork. Verify the handlebars rotate smoothly and are firmly fixed in place. Align the handlebars to your desired riding position before fully tightening. The stem should be inserted into the fork to the minimum insertion line marked on it. Double-check all bolts and fasteners are tightened according to the manual’s specifications. Improper installation can compromise steering control and safety. Ensure a secure connection for optimal performance.
Battery Installation and Charging
To install the battery, locate the battery compartment, typically under the deck of the scooter. Connect the battery securely to the designated wiring harness, ensuring a firm connection. For initial charging, use the provided charger and plug it into a standard wall outlet. Charging times vary, but typically take several hours for a full charge. Avoid overcharging the battery, as this can reduce its lifespan. Always disconnect the charger once the battery is fully charged. Store the scooter in a cool, dry place when not in use. Refer to the manual for specific charging instructions and safety precautions.
Operating the Razor E100
Power on the scooter and use the throttle for speed control, reaching up to 10 mph. Utilize the braking system to safely decelerate and stop.
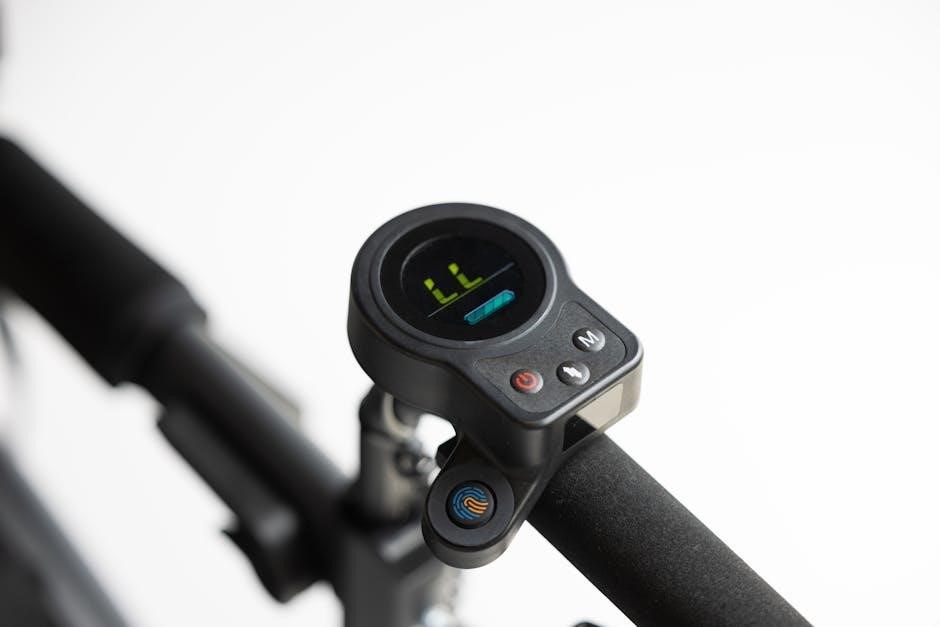
Powering On and Off
To power on your Razor E100, ensure the battery is fully connected and charged. Locate the power button, typically situated near the handlebars or on the deck of the scooter. Press the power button firmly; a light indicator will illuminate, confirming the scooter is active.
Before mounting and operating the scooter, always verify the power indicator is lit. To power off the E100, simply press and hold the power button for a few seconds until the indicator light extinguishes. This ensures the scooter is completely deactivated, preventing accidental activation. Always power off after each use and before storing.
Remember that the motor engages when the scooter reaches 3 mph, so a slight push-off may be needed initially.
Throttle Control and Speed Regulation
The Razor E100 utilizes a simple thumb-controlled throttle located on the handlebar. Gently press down on the throttle to initiate movement and increase speed. The further you depress the throttle, the faster the scooter will accelerate, reaching a maximum speed of 10 mph.
For smooth acceleration and deceleration, apply and release the throttle gradually. Avoid abrupt movements, especially for beginners. Practice in a safe, open area to become familiar with the throttle’s responsiveness. Remember the motor engages at 3 mph, requiring initial foot propulsion.
Maintain control by modulating the throttle according to your surroundings and skill level. Always be aware of your speed and adjust accordingly.
Braking System Operation
The Razor E100 is equipped with a hand-operated brake lever, typically located on the left handlebar. Squeeze the brake lever firmly and progressively to engage the braking system and slow down or come to a complete stop.
Practice braking in a safe, controlled environment to understand the brake’s responsiveness and stopping distance. Remember that braking distance increases with speed and on slippery surfaces. Avoid sudden, forceful braking, which could lead to loss of control.
Regularly inspect the brake cable and brake pads for wear and tear. Ensure the brake lever functions smoothly and effectively. A properly maintained braking system is crucial for safe operation.

Battery and Charging Information
Proper charging and maintenance are vital for optimal battery performance and longevity of your Razor E100. Follow the manual’s guidelines carefully.
Charging Procedures and Times
Before the initial charge, it’s recommended to fully charge the battery. Locate the charging port on the scooter, typically near the motor or battery compartment. Connect the included charger, ensuring a secure connection. The indicator light on the charger will illuminate, signifying charging is in progress.
A full charge typically takes between 12-24 hours, depending on the battery’s state of discharge. Do not overcharge the battery; disconnect the charger once the indicator light changes color (usually from red to green), or after the recommended charging time. Only use the charger specifically designed for the Razor E100 to avoid damage or safety hazards. Always charge in a well-ventilated area, away from flammable materials.
Battery Maintenance and Storage
To maximize battery life, avoid fully discharging the battery before recharging. Partial charges are preferable to complete depletion. If storing the scooter for an extended period (over a month), charge the battery to approximately 70-80% capacity. Store the scooter in a cool, dry place, away from direct sunlight and extreme temperatures.
Periodically check the battery terminals for corrosion and clean them if necessary. Do not attempt to disassemble or modify the battery pack. Improper handling can lead to damage or safety risks. Regularly inspect the battery for any signs of physical damage, such as cracks or swelling. Replace the battery if any damage is detected.
Understanding Battery Range and Factors Affecting It
The Razor E100 offers a typical range of up to 10 miles on a single charge, however, this is an estimate. Actual range varies significantly based on several factors. Rider weight is a primary influence; heavier riders will experience reduced range. Terrain plays a crucial role – uphill riding drastically decreases range compared to flat surfaces.
Riding speed also impacts battery life; higher speeds consume more power. Ambient temperature affects performance, with colder temperatures reducing battery capacity. Consistent stop-and-go riding is less efficient than maintaining a steady speed. Proper battery maintenance, as outlined previously, is essential for optimal range.

Maintenance and Troubleshooting
Regular cleaning, lubrication, and proper tire inflation are vital for maintaining your Razor E100. Address common issues like no power or slow speed promptly.
Cleaning and Lubrication
Maintaining a clean scooter extends its lifespan and ensures optimal performance. Regularly wipe down the frame, handlebars, and deck with a damp cloth to remove dirt and debris. Avoid using harsh chemicals or abrasive cleaners, as these can damage the finish.
Lubrication is crucial for smooth operation. Periodically apply a silicone-based lubricant to the folding mechanism, wheel bearings, and throttle. This reduces friction and prevents corrosion. Inspect the brake cable for fraying and lubricate it as needed.
Pay close attention to the motor area, keeping it free from dust and grime. A clean scooter is a safe and reliable scooter, contributing to a more enjoyable riding experience. Remember to disconnect the battery before performing any maintenance.
Tire Inflation and Maintenance
Proper tire inflation is vital for a smooth and safe ride on your Razor E100. Check the tire pressure before each use, ensuring it matches the recommended PSI (pounds per square inch) found on the tire sidewall. Under-inflated tires reduce range and make steering difficult, while over-inflated tires can lead to a bumpy ride and potential damage.
Regularly inspect tires for wear and tear, including cuts, bulges, or uneven tread wear. Replace tires when they show significant damage or when the tread is worn down. Clean tires with a damp cloth to remove dirt and debris, improving grip and extending their lifespan.
Consider tire sealant to prevent flats. Maintaining correct tire pressure and condition significantly enhances scooter performance and safety.
Common Issues and Solutions (No Power, Slow Speed)
If your Razor E100 has no power, first check the battery connection and ensure it’s fully charged; Inspect the power switch and throttle for proper function. A blown fuse can also be the culprit – consult the manual for replacement instructions.
Slow speed often indicates a low battery, so recharge it fully. Check tire pressure, as under-inflation reduces performance. Inspect the brake lever; if partially engaged, it can limit speed. Ensure the motor engages when reaching 3 mph (5 km/h) as noted in the manual.
If issues persist, consult the full owner’s manual or contact Razor customer support for assistance.

Detailed Component Breakdown
The E100 features a hub motor, brake system, and throttle control. Original equipment is designed for compatibility, ensuring safe and reliable operation for riders.
Motor Specifications and Care
The Razor E100 utilizes an electric hub motor, specifically designed to engage when the scooter reaches a speed of at least 3 mph (5 km/h). This design prioritizes rider control and safety during initial acceleration. The motor is a core component, selected for its compatibility with the scooter’s frame and overall build.
Regular inspection is crucial; check for any unusual noises or resistance during operation. Avoid exposing the motor to excessive water or debris, as this can lead to corrosion and malfunction. While the motor is generally maintenance-free, keeping the surrounding area clean contributes to its longevity. Remember that specifications are subject to change without prior notice.
Brake System Components
The Razor E100’s braking system is a critical safety feature, designed for reliable stopping power. It primarily consists of a hand-operated brake lever, connected via a cable to a brake caliper. This caliper then applies pressure to the scooter’s wheel, creating friction and slowing it down.
Regularly inspect the brake cable for fraying or damage, and ensure the brake lever operates smoothly. Check the brake pads for wear and tear, replacing them when necessary to maintain optimal braking performance. Proper brake function is essential for safe operation; any issues should be addressed immediately. Illustrations in the manual are for demonstration and may vary.
Throttle and Control System
The Razor E100 utilizes a simple, thumb-activated throttle for speed control. Pressing the throttle engages the electric motor, propelling the scooter forward; the further you press, the faster it goes. The motor engages when the scooter reaches approximately 3 mph (5 km/h).
Familiarize yourself with the throttle’s responsiveness before operation. The control system is designed for intuitive use, but practice in a safe, open area is recommended. Note that manual illustrations are for demonstration only and may not perfectly match your scooter’s appearance. Always prioritize safe operation and adhere to the speed limits.

Warranty Information
Razor scooters are covered by a warranty against manufacturing defects. Review the owner’s manual for specific coverage details, claim procedures, and limitations.
Warranty Coverage Details
Razor’s warranty safeguards against defects in materials and workmanship for a specified period, typically 90 days from the date of purchase for electric components. This coverage extends to the motor, battery, and control system under normal use. The frame is often covered for a longer duration, potentially up to one year.
However, the warranty doesn’t encompass normal wear and tear, including brake pads, tires, or damage resulting from misuse, accidents, modifications, or improper maintenance. It’s crucial to retain proof of purchase for warranty claims. The warranty is non-transferable and applies only to the original purchaser. Always consult the complete warranty statement within the owner’s manual for precise terms and conditions.
Claim Procedures
To initiate a warranty claim, contact Razor’s customer support team, providing your purchase date, model number (E100), and a detailed description of the defect. You’ll likely need to submit proof of purchase – a receipt or invoice – along with photos or videos documenting the issue;
Razor may request that you return the defective part or the entire scooter for inspection. Shipping costs for returns are often the responsibility of the customer, unless the claim is deemed valid. Upon verification, Razor will, at their discretion, repair or replace the defective component. Always obtain a Return Merchandise Authorization (RMA) number before sending anything back to ensure proper processing of your claim.
Limitations and Exclusions
The Razor E100 warranty does not cover normal wear and tear, including brake pads, tires, and chain adjustments. Damage resulting from misuse, abuse, accidents, or modifications is also excluded. Furthermore, the warranty is void if the scooter has been subjected to improper maintenance or used outside of its intended purpose.
Consequential damages, such as transportation costs or loss of time, are not covered. The warranty applies only to the original purchaser and is non-transferable. Any attempts to repair or alter the scooter by unauthorized personnel will invalidate the warranty. Razor reserves the right to make changes to the warranty terms without prior notice.

Advanced Riding Techniques (For Experienced Riders)
Experienced riders can optimize battery life and hill climbing by managing weight distribution and maintaining consistent speed during operation.
Hill Climbing Tips
Successfully navigating hills with your Razor E100 requires a strategic approach. Maintain a consistent speed as you approach the incline; avoid sudden stops or reductions in throttle. Lean slightly forward to shift your weight and improve traction.
Remember the motor engages fully at 3 mph (5 km/h), so ensure you’ve reached this speed before encountering the hill. Avoid excessively steep inclines, as they can strain the motor and reduce battery life.
Consider your weight and the scooter’s load capacity – heavier loads will require more power. If the scooter slows significantly, it’s best to dismount and walk it up the hill to prevent damage. Prioritize safety and avoid attempting hills beyond your skill level.
Efficient Battery Usage Strategies
Maximizing your Razor E100’s battery life involves mindful riding habits. Avoid frequent starts and stops, as acceleration consumes significant power. Maintain a steady speed whenever possible, utilizing the throttle smoothly rather than jerky movements.
Riding on flat surfaces will yield the best range compared to inclines or rough terrain. Keep the scooter well-maintained; properly inflated tires reduce rolling resistance, conserving energy.
Be mindful of your weight and the load you’re carrying – heavier loads drain the battery faster. Fully charge the battery before each ride, and store it in a cool, dry place when not in use to prolong its lifespan.
Understanding Scooter Weight Distribution
Proper weight distribution is crucial for stable and controlled riding on the Razor E100. The majority of the scooter’s weight is centered around the deck and battery compartment. Riders should position their feet shoulder-width apart on the deck, maintaining a balanced stance.
Leaning your body weight slightly in the direction of turns helps initiate and control steering. Avoid abrupt shifts in weight, as this can destabilize the scooter.
When encountering bumps or uneven surfaces, bending your knees acts as a suspension system, absorbing shocks and maintaining balance. Be aware that carrying heavy items can alter the scooter’s center of gravity, impacting stability.